|
| |
This page starts out simple, but then goes on to some of the more complex and wonderful
aspects of Flux Studio. Basically, you can make a simple box, then carve it up through
something known as Boolean operations. What you have left looks like a chair.
[NOTE: this page was written a long time ago, the icons have
changed in the current version of Flux Studio; they now look much prettier but function in the
same fashion.]
- I usually like to change the layout of the screens I am looking at so I can view what I
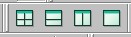
am creating from three sides and a perspective view. Click on the view buttons, select the
one labeled 4 standard views (the 4 boxes)
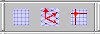
- Then I like to turn on a scale or grid, so that I know the size of the object I am
working with. So hit the box labeled "show global grid" (box full of dots)
 The grid will appear in the
"active window". This is the last window in Flux Studio that you have clicked on, it
is the one with a blue border at the top. I usually turn the grid on in the Front View
window. The grid will appear in the
"active window". This is the last window in Flux Studio that you have clicked on, it
is the one with a blue border at the top. I usually turn the grid on in the Front View
window.
- OK, now click on the Create Box icon
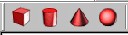 and then click on the
Front View window to deposit the box in the center of it. [If you want to turn off those
green arrows that indicate the axis of your object, hit the View pull down menu, then
select Render Options, then un-check the Show Axis box and hit OK.] and then click on the
Front View window to deposit the box in the center of it. [If you want to turn off those
green arrows that indicate the axis of your object, hit the View pull down menu, then
select Render Options, then un-check the Show Axis box and hit OK.]
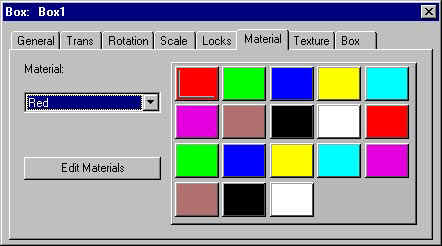
- Now we have a red box. If we double click on the box a properties window appears.
The box is one meter, by one meter, by one meter. If you change any of these values you
will see that you can make a rectangle out of the cube. If you click on the Materials tab,
you will see that you can change the color of the box. Please select the color Blue.
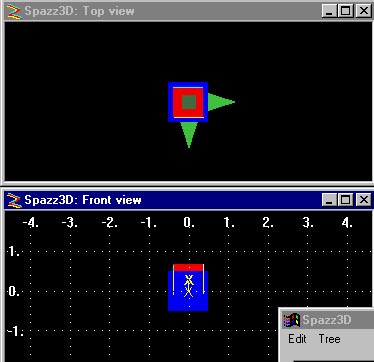
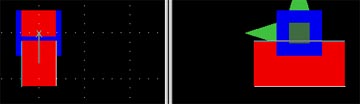
- Now we have a blue box that is 1x1x1 meters. Let's add another box to the scene, click
on the box icon, then click in the Front View where you want to place the second box. For
this lesson place it about one half way up the blue box. In the Front View Window, double
click on the part of the new red box which sticks out of the blue box, and change the
height, width, and depth to .75 (three quarters of a meter).
If you have a hard time selecting the second box, look in the TREE hierarchy window and
double click on the second box there in order to see it's properties.
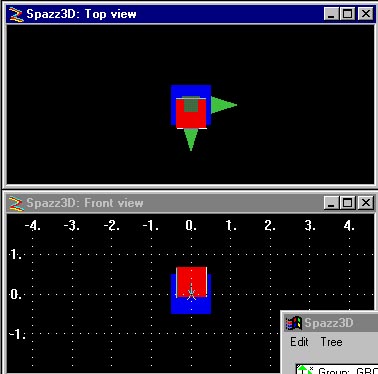
- Observe what happens in the other view windows. If you look in the Top View window you
will see that the red box is centered in the blue box. I would like you to move the red
box forward some. You can do that in two different ways. You can hit the Trans tab on the
properties window, or you can hit the Translate Icon
 (the
double headed arrow). (the
double headed arrow).
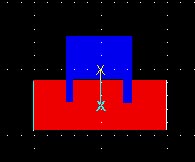
- OK, now here is the magic, you can use one box as a cutting tool on the other box. We
are going to cut the red box area out of the blue box.
- To do this you need to hit the Boolean Extraction icon.
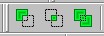 It is
the first one you see here. You will see a Boolean Operations window appear, admire it,
and change the lower option to "Create one node, use node one appearance", hit
OK. Now notice what you have in the viewing windows. To get a better look at what you have
made hit the Dynamic Rotate icon. It is
the first one you see here. You will see a Boolean Operations window appear, admire it,
and change the lower option to "Create one node, use node one appearance", hit
OK. Now notice what you have in the viewing windows. To get a better look at what you have
made hit the Dynamic Rotate icon.  It is the first one pictured
here. After you click the icon, you can then click and drag in the front view window to
rotate the box around. Take a minute to admire your work. Lovely huh? It is the first one pictured
here. After you click the icon, you can then click and drag in the front view window to
rotate the box around. Take a minute to admire your work. Lovely huh?
- If it is not so lovely, then I need to introduce you to the un-do/re-do icon.
Flux Studio features a limitless un-do, re-do functionality that you can use to peel back to your last
"good" point if you find that you need to start an operation over again. You can
hit the un-do button as many times as you need to, all the way back to the beginning of
your session.
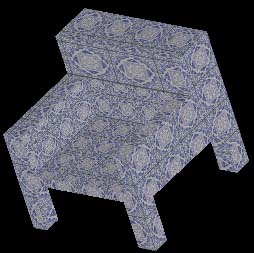
- Well what good it that you might ask yourself? First of all you learned how to make an
object, change it's colors and sculpt it some. Secondly, you learned the function of a
bunch of buttons that you didn't understand earlier. Thirdly, if you use this same
"remove a box from the object" trick a couple more times you will have a simple
chair.
Make another "cutter" box and position it below the seat of the chair. In the
example, I made the "cutter" wider than the chair width (it sticks out on both
sides, see?). Then I use the Boolean operations to cut out that rectangle from below the
chair seat. OK, do this again with another cutter box rotated 90 degrees to the last one
(longer front to back than the chair).
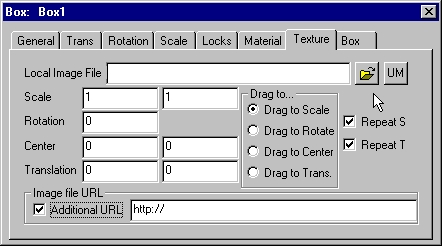
- If you want to upholster your chair, you need to find a simple repeating pattern that is
frequently called a texture. You can apply this texture to the chair by clicking on it's
property window, then selecting the Texture Tab. Flux Studio has many textures, but you can use
any that you might find or create.
|
